In a Build’s General tab, you can configure the following options:
- Define a naming template for the computer name
- Control how the Build Summary screen is displayed just before a build deployment begins
- Select an OS Setup Template
- Select a Disk Partitioning Template
- Enable BitLocker Pre-Provisioning

Configuring the Device Name Template
The Device Name Template controls how the computer name is generated during deployment.
In Windows environments, computer names:
- Must be 15 characters or fewer
- Must be unique within a domain or Microsoft Entra ID environment
Using a consistent naming scheme helps:
- Identify devices easily
- Avoid naming conflicts
- Support automated and zero-touch deployments
Leaving the Device Name Template blank
If the Device Name Template is left blank:
-
The user is prompted to enter a device name during deployment.
Using a naming template
When a Device Name Template is defined, OneDeploy can automatically generate or validate device names during deployment.
Templates can include:
- Fixed text
- Variables
- Letter and number masks
Supported template variables
| Variable | Description |
|---|---|
[SerialNumber] |
The device serial number, read automatically from the BIOS |
[SiteCode] |
The location site code, as defined in Locations |
[Rand#:5] |
Generates a 5-digit random number |
[Rand#:1000-9999] |
Generates a random number between 1000 and 9999 |
[Rand?:5] |
Generates a random 5-character letter string |
[Rand#?:4] |
Generates a 4-character mix of letters and numbers |
* |
Free entry using valid computer name characters |
You can combine these elements to create a standard naming format.
Example naming templates
D[SiteCode]####FSB[Rand#:4]??OneDeploy-*ODP[SerialNumber]
Fully automatic device naming
If a template does not require user input, for example:
ODP[SerialNumber]ODP[Rand#:10000-99999]
Then:
- The device name is generated automatically
- The user is not prompted during deployment
Deployment-time validation
When a naming template includes user-entered components:
- A hint is shown beneath the Device Name field indicating the required format
- The text entry turns green when the input matches the template
- The Next button becomes available only when the name is valid
This helps prevent invalid or incomplete computer names.

Important considerations
Ensure that generated device names do not exceed 15 characters for Windows deployments.
While OneDeploy attempts to prevent invalid templates, some values (such as serial numbers) may cause the final name to exceed this limit, which can lead to errors during Windows Setup.
Show Deployment Summary
The Show Deployment Summary option controls how long the final summary screen is displayed before a deployment begins.
This screen confirms:
- Organisation and location
- Selected build
- Operating system and edition
- Device name
- Driver integration status
Available options
- Until user confirms (default)
- For 10 seconds
- For 30 seconds
- For 60 seconds

The timed options are useful for:
- Automated deployments
- Remote or zero-touch build scenarios
When a timed option is selected, deployment begins automatically once the countdown completes.
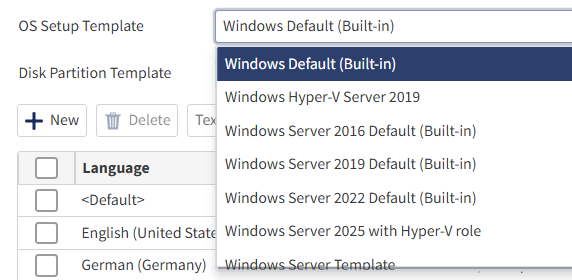
OS Setup Template
The OS Setup Template defines the unattended XML file used by OneDeploy to automate Windows Setup.
These templates control how Windows installs without user interaction.
Built-in templates
OneDeploy includes several built-in OS Setup Templates designed to help users get started quickly.
- Built-in templates are marked with (Built-in)
- They cannot be edited directly
- They are suitable for most standard deployments
If unsure, select Windows Default (Built-in).
Custom templates
Custom OS Setup Templates can be created, viewed and edited from Config → OS Setup Templates.
You can copy a built-in template and modify it to support advanced Windows setup behaviour, such as:
- Custom regional settings
- Advanced unattended setup options
- Specialised deployment workflows
This avoids the need to author complex XML files from scratch.
Disk Partition Template
The Disk Partition Template defines how the local disk is partitioned immediately before operating system installation.
Default templates
OneDeploy includes default disk partition templates suitable for most Windows installations.
For example:
-
Standard Windows Disk Partitions
This creates Microsoft-recommended partitions, including:
- EFI System Partition
- Microsoft Reserved Partition
- Recovery tools partition
Custom disk layouts
For advanced scenarios, custom disk partition templates can be created in:
Config → Disk Partition Templates
These can be used for:
- Specialised hardware layouts
- Multi-disk systems
- Non-standard partitioning requirements
Pre-Provision BitLocker (Windows PE)
This article explains how the Pre-Provision BitLocker option works in OneDeploy, what state the device is left in, how protection is completed, and what to be aware of with modern Windows automatic encryption behaviour.
Overview
Pre-provisioned BitLocker means starting BitLocker encryption during Windows PE, immediately after disk partitioning and before the Windows operating system is applied.
In this mode:
- The disk is encrypted before Windows is installed
- Encryption runs in Used Space Only mode
- No TPM or recovery protectors are finalised yet
- Protection is not enforced until protectors are added later
The result is the disk is encrypted, but not yet bound to TPM hardware or protected by a recovery key.
This approach aligns with Microsoft enterprise deployment best practice.
What “Pre-Provisioned” Mode Actually Is
When BitLocker is started in Windows PE:
- The disk has just been wiped and partitioned
- Very little data exists on the volume
- Used Space Only encryption completes very quickly
- All data written later (including the OS image) is encrypted automatically
At first full OS boot, the device typically shows:
- Conversion Status: Used Space Only Encrypted
- Percentage Encrypted: 100%
- Protection Status: Protection Off
- Key Protectors: None (or Clear Key depending on OS version)
This means:
- The disk is encrypted
- No TPM protector exists yet
- No recovery key has been generated or saved
- Protection is staged but not enforced
The device is waiting for management policy or scripting to complete protection.
What the OneDeploy “Pre-Provision BitLocker” Option Does
When enabled in a Build:
- After disk partitioning has run
- During Windows PE
- Before the OS image is installed
OneDeploy will:
- Starts BitLocker in Used Space Only mode
- Ensures encryption begins while the disk is effectively empty
- Leaves the device in a staged encrypted state
- Does not add TPM or recovery protectors at this stage
No recovery keys are created.
No TPM binding is configured.
No protection is enforced.
It simply ensures encryption begins early, consistently, and deterministically.
Why Protection Is Not Fully Enabled Yet
Pre-Provisioning does not:
- Add TPM protectors
- Generate recovery passwords
- Escrow recovery keys
- Turn Protection Status to “On”
Protection must be completed later by one of the following:
- Microsoft Intune (BitLocker policy)
- Active Directory Group Policy
- MBAM
- Custom scripting
- Manual administration
Until that happens, the device remains encrypted but not secured.
Completing Protection in Managed Environments
Intune (Entra ID Joined)
When a BitLocker policy is applied:
- TPM protector is added
- Recovery password is generated
- Recovery key is escrowed to Entra ID
- Protection Status is set to On
No manual scripting is required.
Domain-Joined (Group Policy)
When BitLocker GPO applies:
- TPM protector is added
- Recovery password is generated
- Recovery key is stored in Active Directory
- Protection is enforced
MBAM
MBAM:
- Adds required protectors
- Escrows recovery keys to the MBAM database
- Enforces protection
Standalone Devices – Enabling Full Protection
If the device is not managed by Intune, Group Policy, or MBAM, you must complete protection manually.
At a high level, this involves:
- Adding a TPM protector
- Generating a recovery password
- Optionally creating a recovery key (.BEK file)
- Saving the 48-digit recovery password securely
- Removing any staging/clear key
- Confirming Protection Status is On
Important
If you generate recovery materials locally (for example under C:\BitLocker\...):
- Immediately copy the recovery folder to secure storage (USB, network vault, password manager, secure file share etc.)
- Verify the copied data is readable
- Delete the recovery material from the local PC once safely stored elsewhere
Leaving recovery material on the encrypted device defeats the purpose of disk encryption.
Failure to securely store recovery information can result in permanent data loss if recovery is required.
Handling BitLocker on Standalone Devices by using a Software Package
For standalone environments (where Intune, Group Policy, or MBAM are not available), BitLocker protection can be completed automatically using a Software Package in OneDeploy.
A Software Package runs during the post-install phase of deployment and can include a PowerShell step where you paste the required BitLocker commands to:
- Add TPM and recovery protectors
- Generate and export recovery information
- Enable full protection once Windows is installed
- Copy the recovery information to a secure location
- Ensure any recovery information is not left on the local storage
This provides a simple way to apply consistent BitLocker configuration as part of a OneDeploy build, even for unmanaged devices.
Windows 11 Automatic Device Encryption – Important Behaviour
Windows 11 (and some Windows 10 devices, plus other modern operating systems) may automatically start BitLocker encryption itself if:
- TPM 2.0 is present
- Secure Boot is enabled
- Hardware meets Device Encryption requirements
- A user signs in
This results in:
- Used Space Only Encrypted
- 100% encrypted
- Protection Off
- No protectors yet
Which can look similar to pre-Provisioning.
However, the key difference is:
- Encryption begins after Windows Setup and first logon
- Several GB of OS data are already present on disk
- BitLocker events appear in the OS event logs after setup
Why You May Still Want to Use the BitLocker Pre-Provisioning option
Even though modern Windows may auto-encrypt, with ‘Pre-Provision BitLocker’ selected:
1. Encryption Happens Earlier
The disk is encrypted before Windows is installed.
2. Faster Deployment
Encryption workload is minimal because the disk is nearly empty.
3. Deterministic Behaviour
Auto-encryption depends on hardware and OOBE conditions.
Pre-Provisioning always occurs when selected.
4. Enterprise Control
You control exactly when encryption starts.
5. No User-Session Impact
Encryption is effectively complete before first logon. For enterprise builds, pre-Provisioning remains recommended.
Where Recovery Keys Are Stored After Protection Is Enabled
| Scenario | Recovery Key Storage Location |
|---|---|
| Intune / Entra | Entra ID device object |
| Domain GPO | Active Directory computer object |
| MBAM | MBAM database |
| Standalone | Only where you manually store it |
Always verify that:
- A TPM protector exists
- A recovery password exists
- Protection Status = On
- Recovery keys are escrowed or securely stored
BitLocker Best Practice Recommendations
- Enable Pre-Provision BitLocker for enterprise builds.
- Use Intune or Group Policy to finalise protection and escrow recovery keys.
- Confirm protection is fully enabled before handing a device to an end user.
- Never leave recovery material on the local disk.
- Periodically verify recovery key escrow compliance in managed environments.
Common Questions
What happens if my device naming template generates a duplicate name?
If a generated name already exists in Active Directory or Microsoft Entra ID, the device may fail to join the directory or may require manual intervention. Always ensure templates produce unique names, especially when using random masks or serial numbers.
Can I change the computer name after deployment?
Yes, but changing a device name after deployment may break naming consistency, affect management records, or require re-registration in Intune, Entra ID, or Active Directory. It is best to assign the correct name during deployment.
Why does Windows limit computer names to 15 characters?
Windows enforces a 15-character NetBIOS name limit for compatibility with legacy networking and domain services. OneDeploy templates should be designed to stay within this limit. You may see errors during Windows setup if your computer name exceeds 15 characters.
When should I create a custom OS Setup Template?
Most standard deployments can use the built-in templates. However, you can configure your own custom templates for advanced control over Windows Setup options.
Can OneDeploy deploy to multi-disk systems?
Yes. For advanced hardware layouts or systems with multiple disks, you may need a custom Disk Partition Template to ensure the correct disk is targeted and partitioned.
Does OneDeploy support fully zero-touch deployments?
Yes. By combining:
- Fully automatic device naming
- Timed deployment summary
- Driver automation
- Managing the Network Boot behaviour of the computer
- Optional BitLocker pre-Provisioning
OneDeploy can support remote and zero-touch deployment workflows.
What is the Deployment Summary screen used for?
The Deployment Summary confirms key deployment selections (Organisation, build, OS, naming, drivers, options) before installation begins. Timed modes are useful for automation where no user confirmation is required.
Do built-in templates get updated automatically?
Built-in templates are maintained by OneDeploy and cannot be edited directly. If you need to customise behaviour, copy a built-in template and create a custom version.
Should I always enable BitLocker Pre-Provisioning?
Not always. It is recommended for enterprise deployments where encryption must begin as early as possible, but environments using automatic Windows Device Encryption may already encrypt later during setup. Pre-Provisioning provides earlier and more deterministic control.
Is pre-Provisioning the same as fully enabling BitLocker?
No. It encrypts the disk but does not enforce protection until protectors are added.
Does Windows 11 make this option unnecessary?
Not entirely. Windows may auto-encrypt later, but pre-Provisioning ensures earlier, faster, and predictable encryption during deployment.
Is Used Space Only secure?
Yes. Once encryption begins, all new data written to the disk is encrypted automatically.
However, it is important to understand the limitation of Used Space Only encryption:
- Only the disk blocks currently marked as “in use” are encrypted initially.
- Free space is not immediately encrypted until it is written to later.
In deployment scenarios, disks are often prepared using DISKPART clean or quick format, which does not securely erase previously stored data. If the disk previously contained unencrypted information, remnants of that data may remain in unallocated space and could be forensically recoverable until those sectors are overwritten or the entire disk is fully encrypted.
For environments with very strict data sanitisation or security requirements, consider:
- Performing a full disk wipe before deployment
- Confirming the device was already encrypted prior to re-deploying
- Using a custom Disk Partition Template in OneDeploy to perform a full format before BitLocker pre-Provisioning – however a ‘full format’ will slow down your deployments
This ensures the disk is appropriately sanitised before encryption is applied.
If I have enabled Pre-Provision BitLocker, is my device secure?
Not fully (yet). Pre-Provisioning encrypts the disk during Windows PE, but does not add TPM or recovery protectors or turn protection on.
Until Intune, Group Policy, MBAM, or a post-install step completes BitLocker setup and recovery key storage, the device remains encrypted but not fully protected. In this staged state, if the disk were removed before protection is enabled, its contents may still be recoverable.
Related Articles
- Managing BitLocker with Intune
- BitLocker Group Policy Configuration
- Understanding BitLocker Protectors
- Device Encryption in Windows
- Disk Partition Templates in OneDeploy