Overview
Understanding OneDeploy’s terminology is key when working with applications. Three core terms are used throughout the platform:
Vendor
The company that produces the application.
Example: Adobe Inc.
Software
The general product name of the application.
Example: Adobe Acrobat Reader
Software Package
A specific version of a Software application. A Software Package includes:
- A specific version of the Software
- The installation source media
- One or more installation steps
Example:
Adobe Acrobat Reader v2025.001.20693
In short:
- Vendor = Who makes it
- Software = What it is
- Software Package = Which version and how it installs
Where to Define Software
You can define Software in:
Definitions → Software
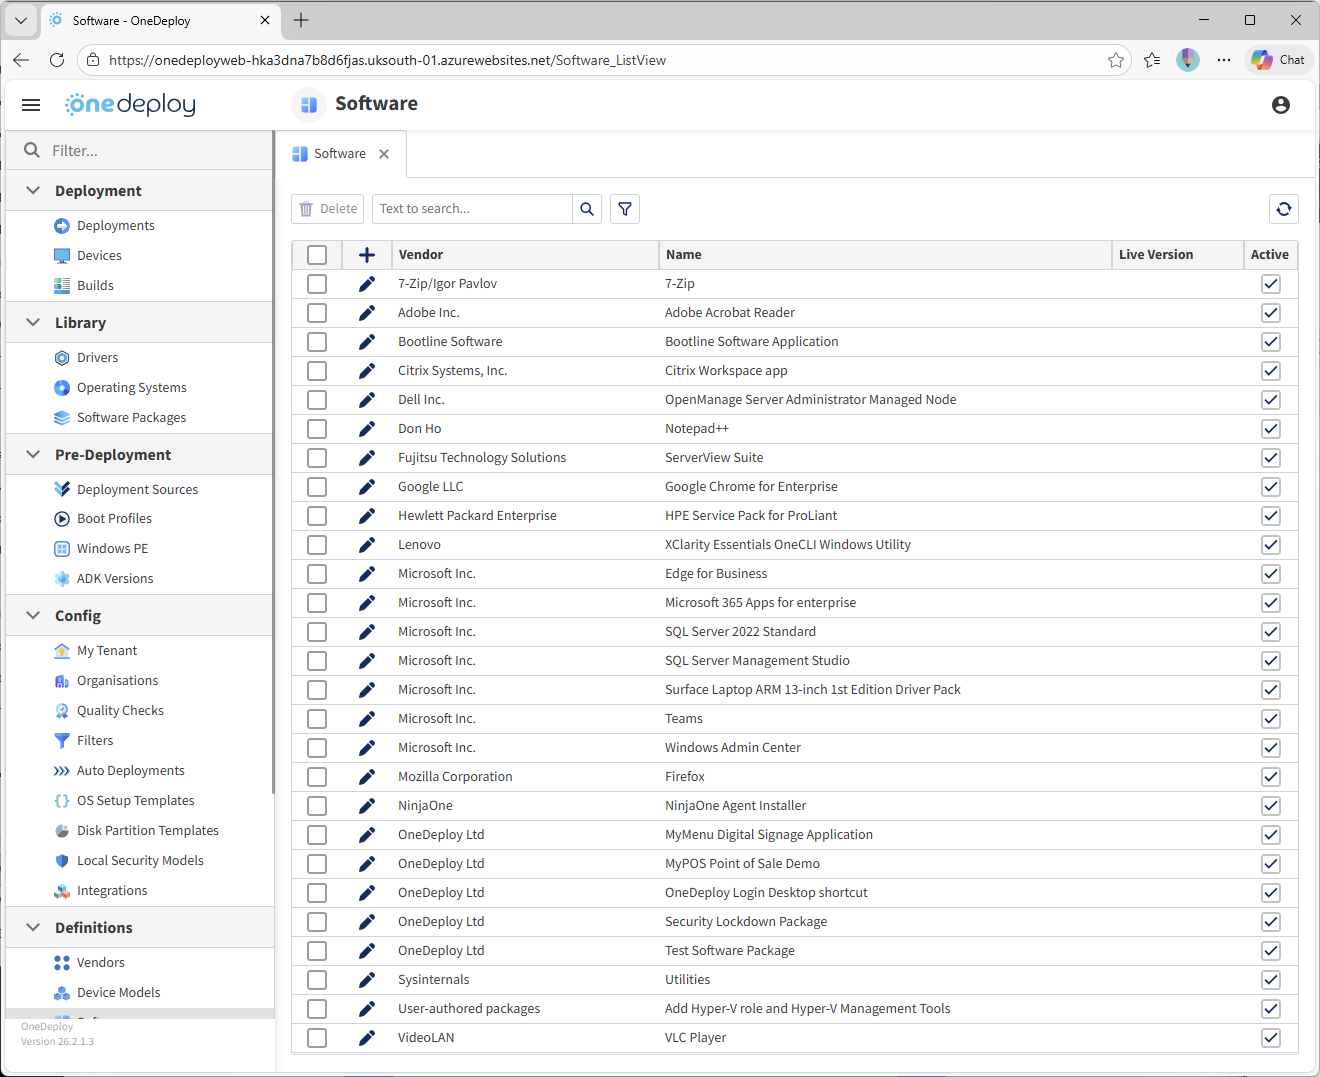
This screen displays a list of all defined Software entries.
From here, you can:
- Add a new Software item
- Delete Software items
- View or define the Live Version of each Software item
Adding a New Software Item
A Software entry requires:
- A Vendor
- A Software Name
Example:
- Vendor: Adobe Inc.
- Software: Acrobat Reader
To add a new Software item:
-
Go to Definitions → Software
-
Click the “+” icon in the column header
-
Select an existing Vendor from the list

-
Enter the Software name
-
Click the Save icon
The Software entry is now ready to have one or more Software Packages created under it.
I Want to Add a Software Package to a Build — What Do I Do?
Follow this order:
- If the Vendor and/or Software do not already exist, create them in Definitions → Software
- Go to Library → Software Packages
- Create a new Software Package, add your source files and define installation steps
- Add the Software Package to your Build(s)
Live Version
OneDeploy includes a powerful concept called Live Version.
This allows you to define a “preferred” version of a Software item that Builds can automatically use — even if a different version is explicitly listed in the Build.
This is especially useful for applications that are:
- Frequently updated
- Used across multiple Builds
- Required to be upgraded (or downgraded) quickly across your estate
Standard Upgrade Method (Manual Approach)
Imagine the following:
You have:
- Software: Microsoft 365 Apps for enterprise
- Vendor: Microsoft Inc.
- Software Package version: 19029.20244.
Later, you download a newer version, 19426.20260.
You would:
-
Create a new Software Package for 19426.20260 under the same Software entry
-
Open each Build that contains version 19029.20244

-
Remove the older version from the Build

-
Add the newer version
This works — but it does not scale well if the Software exists in multiple Builds.
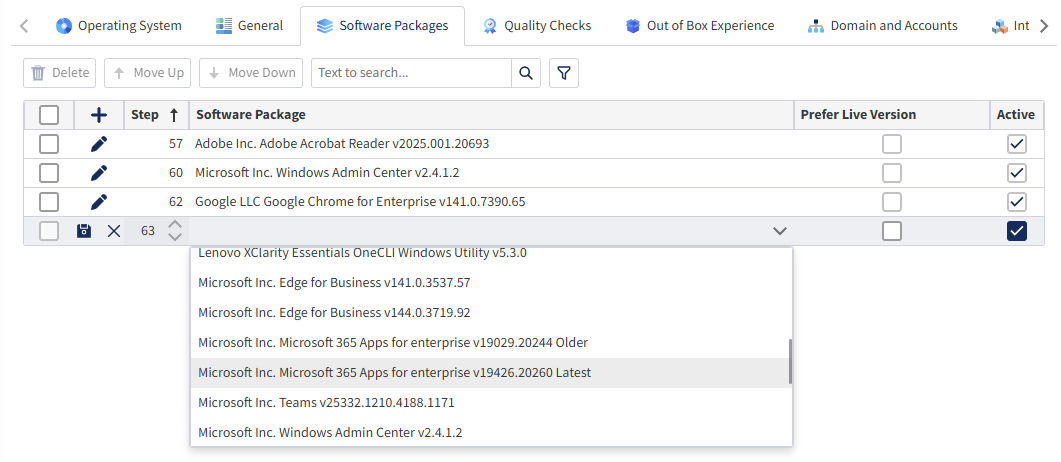
Using ‘Live Version’ (Recommended for Scalable Updates)
Instead of editing every Build, you can:
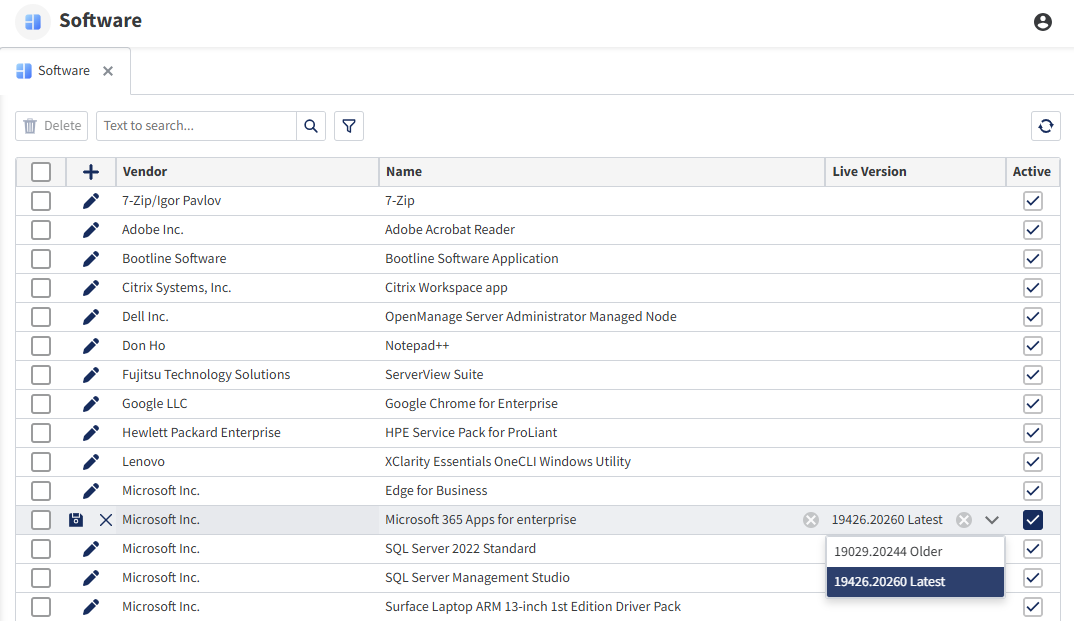
Step 1 — Define a ‘Live Version’ of a piece of Software
In Definitions → Software, set the preferred Software Package as the Live Version.
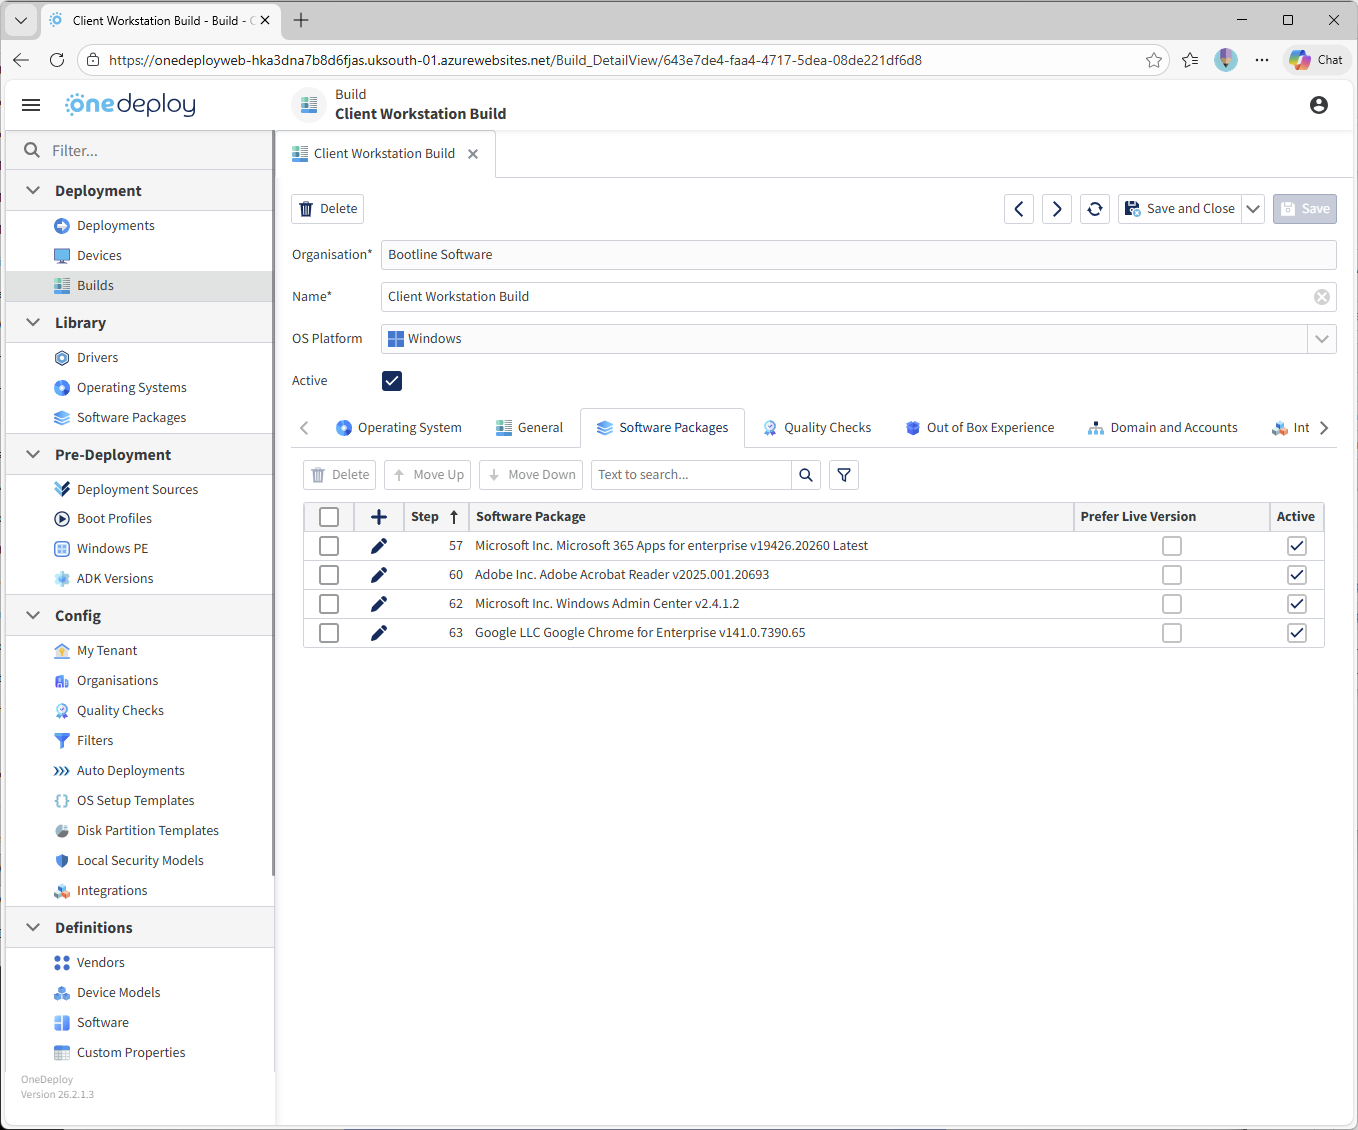
Step 2 — Enable “Prefer Live Version” in Builds
In your Build(s), select Prefer Live Version for that Software entry.
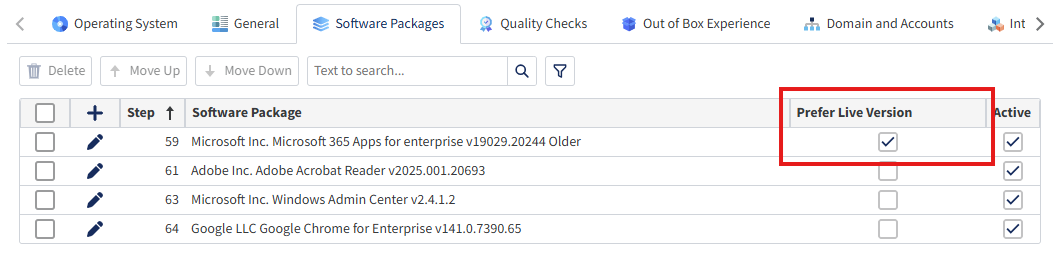
Now, whenever that Build is deployed the Live Version will be installed, even if a different version is explicitly listed in the Build
In our example Version 19426.20260 will install even though 19029.20244 is shown in the Build’s Software list because “Prefer Live Version” is selected
(The words Older and Latest have been added to the screenshots for clarity – OneDeploy does not add these labels)
Why Use Live Version?
Using this optional feature, it allows you to:
- Upgrade software across multiple Builds without editing each Build individually
- Revert to a previous version quickly across all Builds
- Maintain central control over frequently updated applications
- Reduce configuration drift
This feature is especially useful for applications such as:
- Microsoft 365 Apps
- Google Chrome, Edge and other browsers
- Other ‘must be up-to-date’ applications such as Oracle Java, Adobe Reader
- Security tools
- Line-of-business apps with frequent releases
Common Questions
What happens if “Prefer Live Version” is not selected?
The Build will install the explicitly defined Software Package version in the Software Packages list.
Can I change the Live Version later?
Yes. Changing the Live Version immediately affects all Builds that have “Prefer Live Version” enabled for that Software. It is recommended to have a test build completed that uses the Software Package specified explicitly before setting ‘Live Version’ flag.
Can different Builds use different versions?
Yes. If “Prefer Live Version” is not selected in a Build, it will continue using its explicitly defined version.
Is the “Live Version” feature a replacement for patching or software update management?
No. The Live Version feature controls which version of an application is installed during a OneDeploy build. It does not manage ongoing updates once a device is deployed.
Organisations should have a separate strategy for keeping software up to date across their estate, such as:
- Patch management solutions
- Endpoint management platforms (e.g. Intune, ConfigMgr, RMM tools)
- Application update policies
- Security vulnerability management processes
Live Version is designed to help you manage version consistency at deployment time, particularly across multiple builds. It is not intended to replace ongoing software maintenance and patching practices.
Related Articles
- Library → Software Packages
- Builds → Software Packages Tab
- Definitions → Vendors
- Managing Application Updates Across Multiple Builds