MSI step (Software Packages)
The MSI step is a specialised step type for installing Windows Installer packages (.msi) as part of a Software Package.
It provides a structured way to run MSI-based installs with the correct installer engine, while still allowing you to supply your own silent install parameters.
When to use an MSI step
Use an MSI step when:
- Your installer is an
.msifile - You want a consistent, predictable MSI installation experience
- You need to supply MSI properties (for example
ALLUSERS=1) or standard MSI switches (for example/qn)
If your install is an EXE wrapper (even if it ultimately installs an MSI), use an Execute step instead.
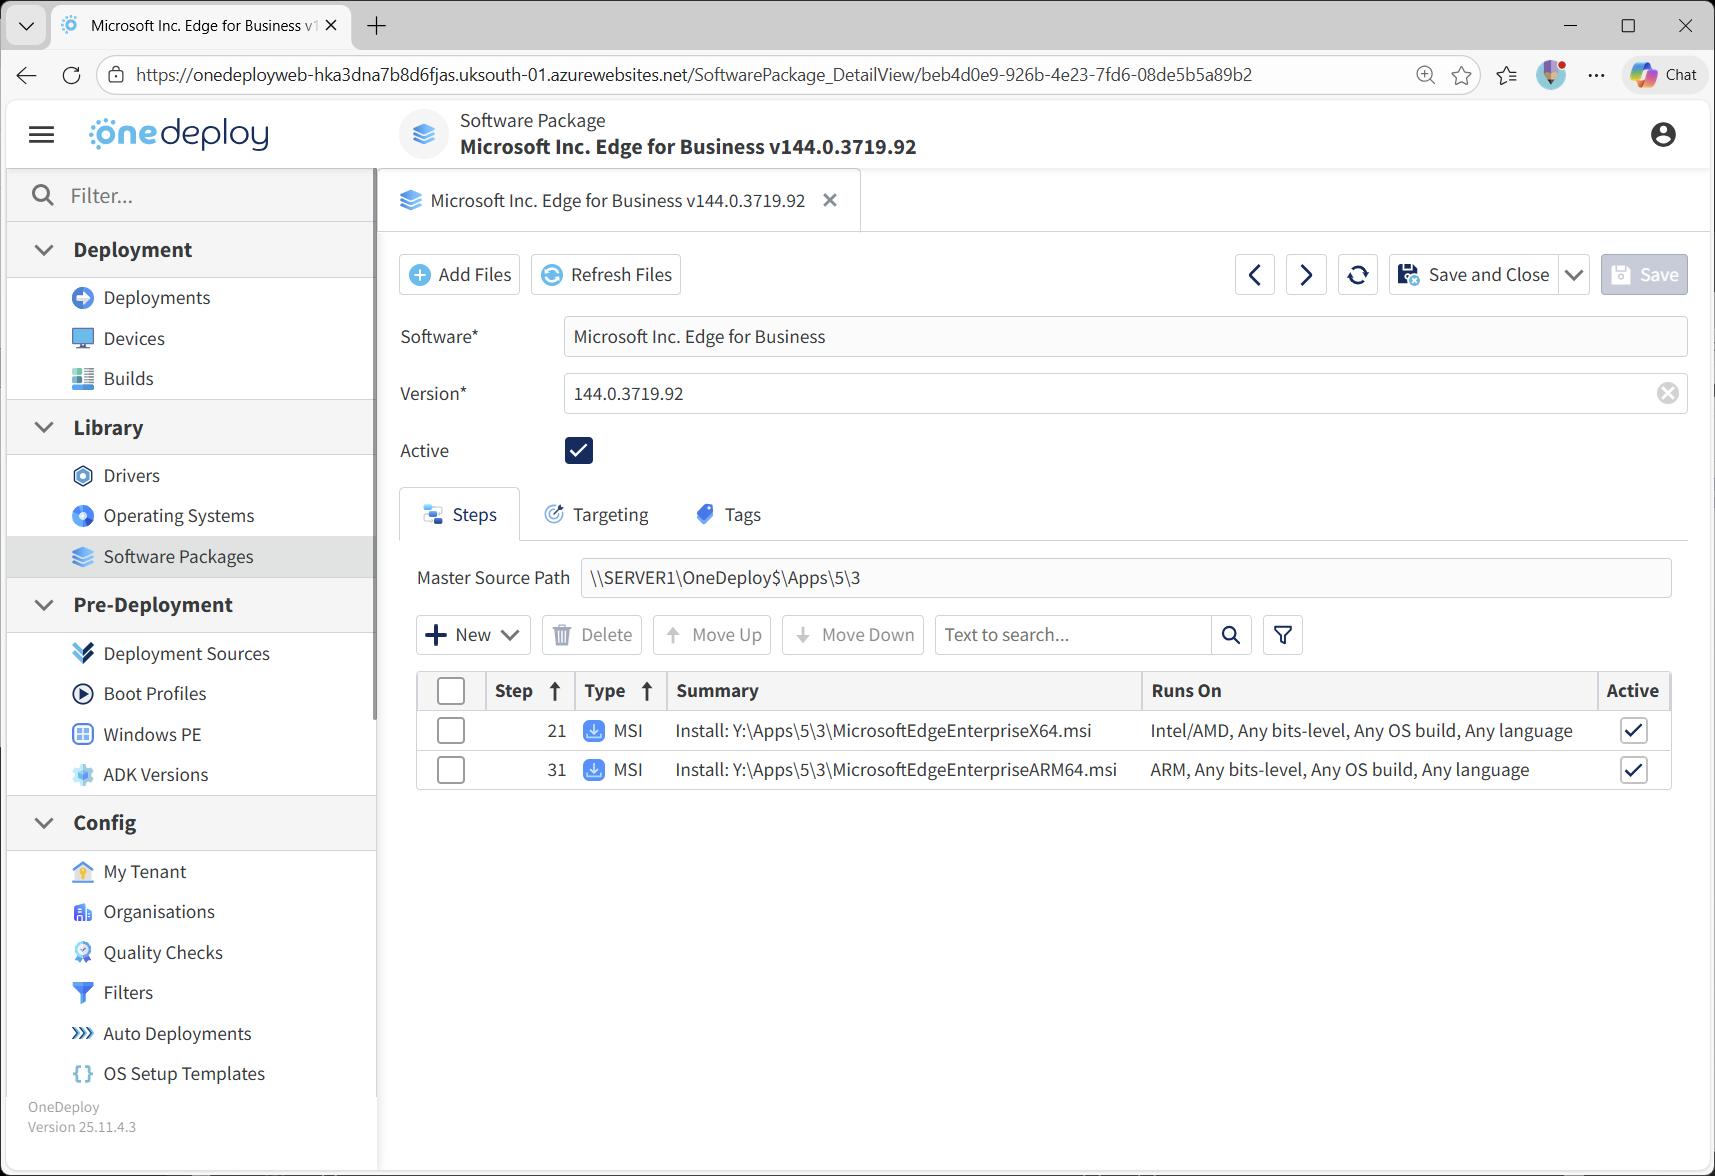
MSI step screen overview
When you add an MSI step to a Software Package, the MSI properties screen is displayed.
From this screen, you can configure:
- Whether the step is Active or Inactive
- The Install Type (MSI)
- The File Path to the MSI package
- Command Line Params (silent switches and MSI properties)
- An optional Source Folder
- An optional Working Folder
- Optional Checks and Targeting

File Path
The File Path is the path to the .msi file that will be installed.
Example:Y:\Apps\5\3\MicrosoftEdgeEnterpriseX64.msi
Command line parameters
The Command Line Params field is where you add MSI switches and properties.
You do not need to specify /i
You do not need to include the /i install switch (for example msiexec.exe /i ...).
OneDeploy handles the MSI install invocation automatically.
You only need to provide:
- The MSI file path (in File Path)
- Any required command line parameters (in Command Line Params)
Common silent install switches
Typical silent install parameters include:
/qn(completely silent, no UI)/quiet(quiet install – behaviour can vary by package)/norestart(prevents the installer from forcing a reboot)
Example:/qn /norestart
Source Folder
Use Source Folder when the MSI is located in a subfolder beneath the Software Package root folder.
- Leave blank if the MSI is in the root
- Specify the subfolder path if required
The Software Package root folder is shown on the Software Package page under Master Source Path.
Working Folder
The Working Folder defines the directory context used when the MSI installation runs.
This is useful when:
- The MSI references additional files using relative paths
- The installer expects to run from a specific directory
- You are installing from a folder containing transforms (
.mst) or supporting content
If you use relative paths in MSI parameters (for example referencing an .mst file), setting a Working Folder can improve reliability.
Common MSI properties and tips
Quoting paths and parameters
If a path contains spaces, use quotes.
Common examples:
- When referencing a file path in a parameter (such as an MST transform)
- When passing a property that includes a folder path
Example patterns:
TRANSFORMS="My Transform.mst"INSTALLDIR="C:\Program Files\Vendor\App"
MSI transforms (MST)
If you use an MST transform, it is typically passed as a parameter (Vendor/package dependent).
A common pattern is:
-
TRANSFORMS="custom.mst"
Ensure the .mst file is included in the Software Package source and accessible at install time (often easiest when the Working Folder is set appropriately).
Logging
MSI installs can produce logs, which can be extremely helpful for troubleshooting.
A common logging pattern is:
-
/l*v "C:\ProgramData\MyApp\Logs\install.log"
(Only use log paths that you are confident exist, or create the folder beforehand using a Copy, CMD, or PowerShell step.)
Avoid reboots
As with all automated build steps:
- Always suppress reboots where possible (
/norestart) - Avoid MSI packages that force a restart mid-build
Unexpected reboots can interrupt the build and result in incomplete installs.
Using Checks and Targeting
You can optionally configure Checks and Targeting for MSI steps.
-
Use Checks to confirm the install succeeded (for example, file existence, registry values, installed application markers)
-
Use Targeting to run the correct MSI on the correct devices (for example x64 vs ARM64)
This is especially useful when a Software Package includes separate MSI installers for different architectures.
Common questions
Should I use MSI step or Execute step for MSI files?
If you are installing a real .msi file, use the MSI step.
If you are running an .exe installer (even if it installs an MSI internally), use Execute.
Do I need to include msiexec.exe or /i?
No.
OneDeploy handles the MSI install invocation. You only supply the MSI path and parameters.
Why may I have two MSI steps in one Software Package?
This is commonly done to support multiple processor architectures (for example Intel/AMD vs ARM), using Targeting to ensure the correct installer runs.
Can I install MSIX files using the MSI step?
No.
The MSI step only supports .msi files. MSIX packages use a different installation mechanism and are not compatible with msiexec.
How should MSIX packages be installed in OneDeploy?
Use a PowerShell step.
PowerShell provides native support for installing MSIX packages and is the recommended and supported approach.
Related articles
- Software Packages overview
- Steps tab overview
- Execute step
- Targeting Software Package steps
- Using Checks in Software Package steps