Overview
This guide explains the minimum steps required to update an existing build from Windows 11 24H2 to 25H2 in OneDeploy.
This process does not require recreating the build — you simply update the operating system referenced in the 24H2 build.
Prerequisites
Before updating your build:
-
You must have downloaded and added the Windows 11 25H2 OS added to your library
Library → Operating Systems (described below).
Step 1 – Add Windows 11 25H2 to the OS Library
- Navigate to Library → Operating Systems
- Click Add
- Select your downloaded Windows 11 25H2 source – either an ISO file or extracted Windows installation files
- Complete the import process
Once complete, Windows 11 25H2 will be available for selection in builds.
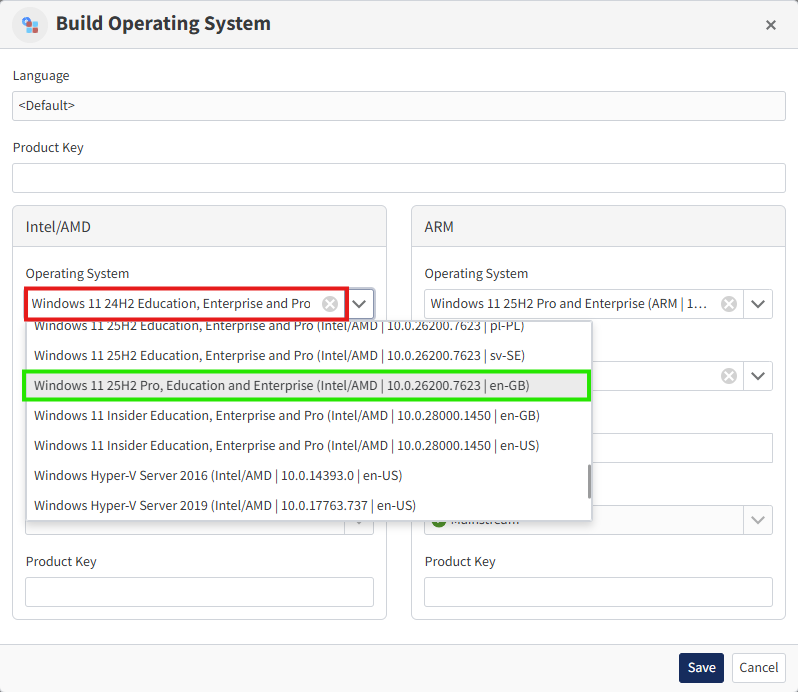
Step 2 – Update the Build to Use 25H2
- Navigate to Deployment → Builds
- Select the build you want to update
- Open the Operating System tab
- Edit the existing OS entry
- Change the Operating System selection from Windows 11 24H2 to Windows 11 25H2
- Repeat for any other language or Architecture versions that require updating.
- Click Save
Step 3 – Publish Your Changes
- Go to Config → My Tenant
- Click Publish Config
- (Optional) Enter a description
- Click OK
Result
- The build will now deploy Windows 11 25H2 for all future deployments
- All other build settings (drivers, apps, configuration) remain unchanged
Common Questions
Does updating the OS affect other build settings?
No — only the operating system changes. Everything else in the build remains the same.
Do I need to recreate the build?
No — you can switch the OS on an existing build in seconds.
Do I need to publish after making this change?
Yes — the updated OS will not be used until you Publish Config.
What about machines already deployed using this build?
Devices that have already been deployed are not affected by this change. Updating the operating system in a build only applies to future deployments, not existing machines.
Related Articles
- Operating Systems (Library)
- Builds
- Publishing Configurations